
If you purchase an item through links on this page, we may earn a commission. Our editorial content is not influenced by commissions. Read full disclosure.
Winter is a great time to create indoor artwork with coffee, tea or hot chocolate. But you can also create art outdoors. Have you ever heard of ice art?
Unlike snow angels or snowmen, ice art is made using ice. You create it by freezing water into fun shapes with colors or materials added before it freezes. The result is like something out of a magical frozen fairy tale.
If you want to bring some ice magic into your home this winter, follow this guide to creating eye-catching ice art!
1. Hanging Ice Art
 Photo by Sarah Yule
You can sometimes find these incredible works of art in your neighbors’ parks, community centers and gardens. But it’s easy to create some in your own backyard or even on your apartment balcony!
To make an ice art canvas, you need to bundle up and go outside to find your materials. You can pick anything from mistletoe to twigs, wilted flowers or seed heads. The key is that you have a collection of materials that you find appealing to place inside the artwork.
 Photo by Sarah Yule
Here are some suggested materials:
- Sheets
- twigs
- Berries
- Shells
- Grasses
- animal feathers
- rosehips
- feathers
- seed heads
If you have young children, this project is the perfect way to inspire them to get outside and enjoy nature even when it’s cold!
Then you have to gather the equipment, which is simple.
You need a container (or several) and access to water. These can be small take-out containers, Tupperware or large buckets. Most people use a kettle or pitcher to carry water into a larger container, but you can use anything.
You also need a string to hang the ice art. Maybe you want to hang your art on a clothesline, in trees, or by your window. You can also hang them on garden hooks or low growing shrubs to add different layers.
See what looks best and what appeals to your artistic sense.
Steps to create an ice cream illustration on a string
Wait for a day when the temperatures will be below zero. You can do the job when it’s warmer and wait for it to freeze overnight or the following days. If you don’t want to work on the containers outside, you can work on them at home and move them outside.
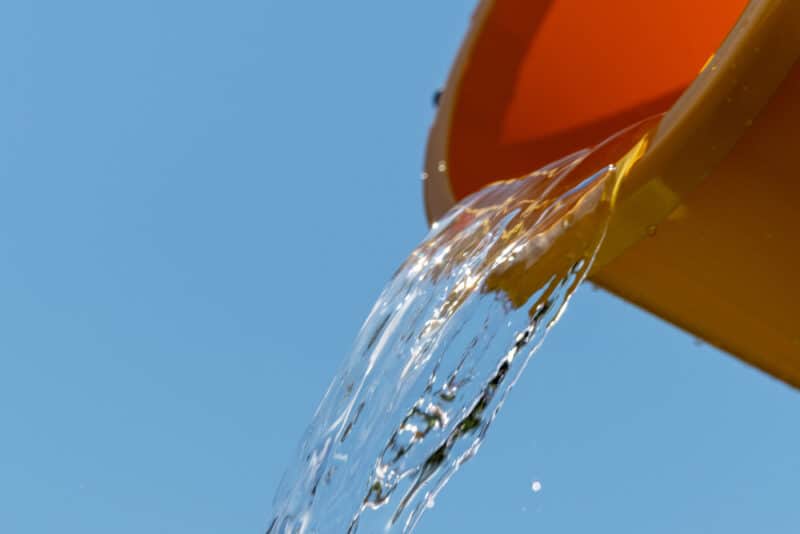
Remember that buckets filled with ice can be very heavy. If you have a large bucket, just make a thin layer in the base and gently place your material where you want it.
Line up your containers in an easy-to-reach place and you can pour the water carefully. For example, an outdoor bench or table would be great, as the water will be instantly exposed to freezing temperatures.
Place the natural materials in the container, pour in the water, and place the string at the top of the container to create a handle. You can also lay a stick on top and tie the string to it.
You can always cut the string if you prefer handleless art. But it is necessary to remove the block from the bucket. Also, you won’t be able to hang it.
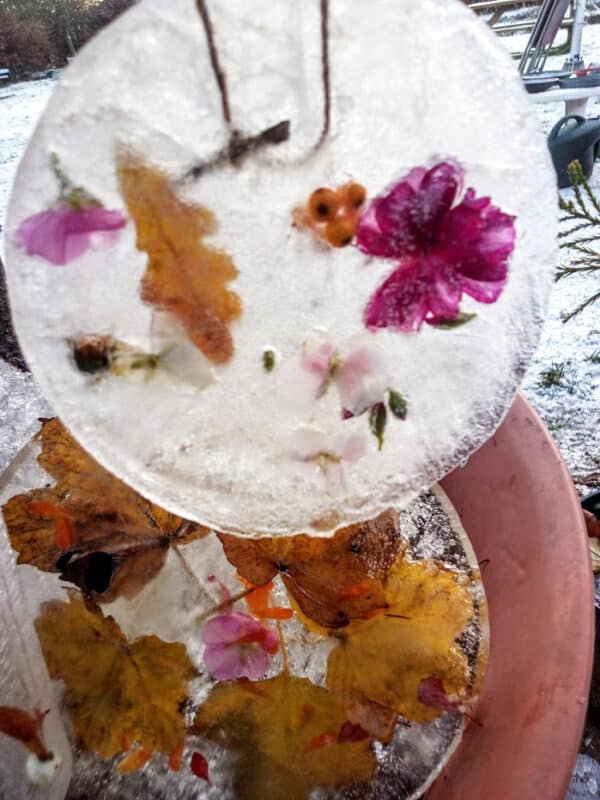 Photo by Sarah Yule
For an artistic touch, you can stir the materials for a collage effect. Or, you can leave a dried leaf in the center and keep your design minimal. Think of it as a painting and experiment with different shapes and locations of your materials.
If you are lucky, you can see your artistic transformation overnight while the temperatures are low. Leave the artwork in a cool place and come back in the morning to see what it looks like!
Tips for ice art on a string
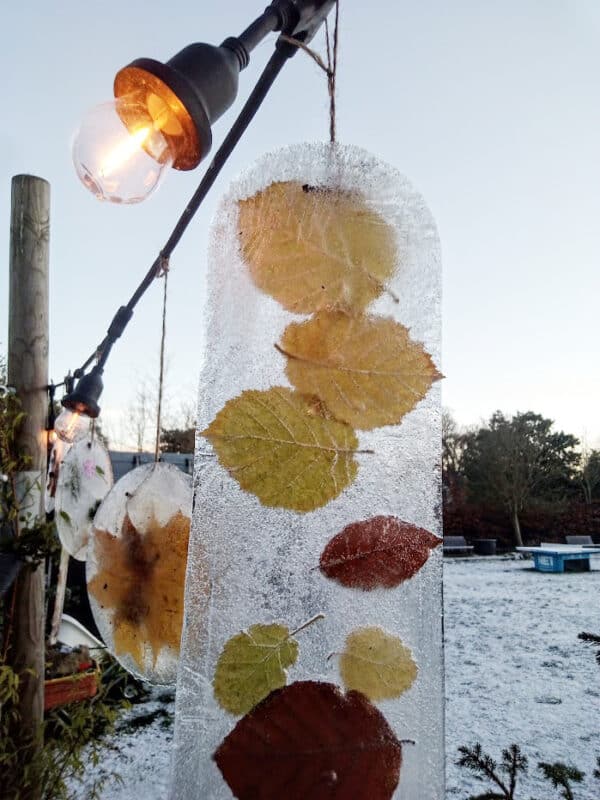 Photo by Sarah Yule
When choosing your container, you need to consider the material, as it will impact the finished artwork. The best choice is plastic or silicone as it can bend when you remove your art.
Be careful when removing the ice cream from the container, as it tends to shatter if you are not careful. And the last thing you want is to spend time making ice art only to have it ruined when you go to hang it.
For hanging ice art, you can also use die-cut plastic shapes to give your art more variety. If you have heart shapes, monsters, or tree molds in your kitchen cupboard, you can reuse them for your ice cream artwork.
Then wash them and reuse them to make cookies, so you don’t have to buy new items for that art project. It’s about using what you can find in nature and experimenting with different molds, so have fun!
Ice art balloons
 Photo by Sarah Yule
Another great way to have fun outdoors is to make ice art balloons. All you need to make these colorful creations are water balloons, food coloring and water.
Similar to ice art on a string, you can leave them outdoors or temporarily place them indoors as an ice sculpture, depending on your space. You can stick natural materials inside the balloons or leave them plain.
If you can’t find the right materials in your yard for string ice artwork, this is a great option for making the most of freezing temperatures. Fill your water balloons with water and sprinkle a line of food coloring in the middle.
You can create a unique color by combining several colors and swirling them around with a twig or kitchen utensil. Or, you can add gel food coloring and lightly swirl it around to create patterns.
Then close the balloon, place it outside and wait for the water to freeze.
 Photo by Sarah Yule
Instead of or in addition to food coloring, you can sprinkle glitter or confetti for more texture in your design. If you want a clear ice balloon, you can skip the coloring or materials and fill your balloon with just water. Or add natural materials like flowers.
When filling the water balloons with water, be careful not to overfill them or the balloon will burst as the ice expands. Go slowly as you fill the balloon and stop when there is still enough room for the material to expand.
Ice flower shapes

During the winter holidays, it’s nice to have friends and family over for meals, so why not treat your guests to some creative drink decorations?
Floral ice cream shapes are a great addition to your party drinks and can be made in hours!
You will need a collection of edible flowers, molds and water. Some choices for edible flowers are:
But if you want to add other herbs or other edible flowers, you can. Our guide offers 46 edible flower options.
You can try this throughout the winter and replicate it in the spring and summer for a refreshing drink.
The process may seem easy when making these floral scoops of ice cream, but you need to know how to do it right if you want clear artwork without cloudy bubbles or a messy finished creation.
How to Get the Perfect Floral Ice Cream Shape

The only way to get the beautiful finished artwork clear and when you can see the flower in the middle is to use distilled water and boil it twice before freezing. Pour the water into the mold, add the flower and turn it upside down to freeze it.
It might seem like a lot of work just to freeze the ice, but trust us; it will give you a nice result.
Look for ice cream molds that allow you to flip them over if you’re creating those scoops of ice cream for an event. This is because water freezes from the top down, which means the water particles will move down and give you clear ice at the top.
You can also use round molds for this process, but remember to use distilled water and boil it twice. Freeze slowly over time and the water will be even clearer.
Do not use lukewarm water to separate the ice cream scoops from the mold. Leave them in a warm (not hot) place for 10 minutes, then pour cold water over the edges. This will give them the extra moisture to pop out of the mold without ruining the fantastic design.
Where to place the ice illustrations
 Photos of Sarah Yule
Deciding where to place your ice art can be tricky, depending on where you live and the temperatures. Ideally, you want to leave your artwork on ice somewhere out of direct sunlight and sheltered from wind or rain.
Some people hang their artwork on the door of their garden shed or hang ice balls on their porches at the entrance to their home. You can also stick the ice art piece into the ground along your garden path to create a decorative touch.
You can make ice lanterns with similar methods to create a light path for dark winter nights. It’s a nice way to use ice art and have something useful when you’re walking around outside at night.
Don’t let freezing temperatures keep you from making art. Try these ideas and sprinkle some sparkle into your property this winter!
Was this article helpful?
Yes No ×
We appreciate your helpful feedback!
Your response will be used to improve our content. The more feedback you give us, the better our pages will be.
Facebook pinterest