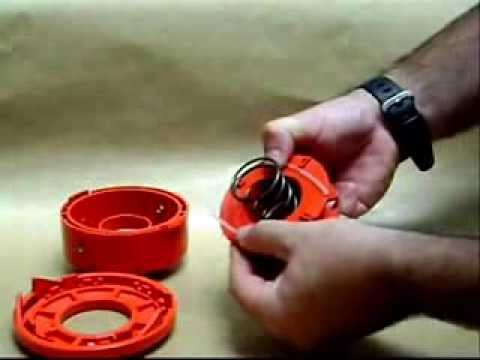
When weeds need weeding in the garden, finishing the flower beds around the house or clearing the forest we own, we use the brush cutter and very often we use it with a wire head installed.
However, we’ve all had the experience at least once of throwing a few swear words to the wind after trying to hold it between your teeth while trying to refill the cartridge to replace the terminated cable. Changing your brushcutter’s string is actually a lot easier than you might think, as long as you follow a simple procedure correctly.
Obviously, there are different types of cartridges that require different ways to reload the cable, so we will briefly describe the best procedure to load the cable with the least effort for each type of cartridge.
Contents [Ocultar]
-
“beat & go” cable head
-
Quick charge wire head
-
Manual loading and unloading line head
-
Thread head in pieces
“beat & go” cable head
These are the line carrier heads that today equip almost all brushcutters, which have imposed themselves since the 90s as a replacement for the old manual heads. The advantage of this type of cartridge is that if the cable is shortened by small breaks, it is possible to lengthen it without turning off the tool, simply by tapping it on the ground. Of course, as long as the skein of yarn lasts inside the cartridge and you leave, once it runs out you will need to change the yarn.
As one can see? The “beat and go” appearance is that of a flattened polymer cylinder of large diameter with two holes symmetrical to the axis of rotation from which the wire comes out and with a smooth knob counteracted by a spring in the part in contact with floor. The two shells that make up the head are held together by an interlocking system, usually with two legs.
How to change the thread. Changing the “tap and go” cartridge thread is not difficult, you learn how it works and with a little manual skill it can be done in minutes.
-
The head is opened, normally by pressing on the two legs of the joint.
-
Inside the head there is a spool (which, depending on the model, can be attached to the button) around which the thread must be rewound, taking into account the arrows printed on it or the words “wind line”, which can be translated as “steering winding”.
-
The thread must be used in the appropriate diameter and length for the head, which in turn is sized in relation to the brushcutter, the choice of thread is a topic on which more information can be obtained in the dedicated article. Generally, in the use and maintenance book of the brushcutter, the meters of wire that can be loaded and the relative diameter of the section used are reported. It is important to use wire diameters that meet brush head specifications to avoid clogging leaks or breaking wire stops.
-
In fact, the yarn is rewound onto the spool after being cut and measured, and doubled (or cut in half), by pinning the half-length fold (or one end) to a punch or raised eyelet on the surface of the coil.
-
After having completely wound the thread, taking care to wind each of the garments on a unique and different portion of the coil of the two separated by a partition, the last 15 cm of the two garments are blocked by inserting them into notches or eyelets at the edge of the coil.
-
The spool will now be placed in the half-housing attached to the brushcutter and once correctly positioned, it will pass from one end to the other through the wire outlet sockets.
-
At this point all we will do is close the cartridge with the bottom half of the socket and pull the ends of the cable to unlock them from the stops where we had stuck them.
Operation . Whether the spool is single or with the button countered, it makes little difference in practice: when you speed up the brushcutter and hit it against the ground with the button, it will come up a little, releasing the spool from the raised point . stops on the bottom half of the spool and allows centrifugal force to pull some of the thread, thanks to the spool now free to spin. The contrast spring will push the control (and therefore the spool) against the stops, preventing yards and yards of cable from coming out.
A thing. A small trick to avoid wasting the wire, for the heads that foresee the anchoring of the wire with a single piece folded in half, is to leave one end longer than the other by about 15 cm. In fact, the binding seats of the terminals on the spool are facing towards the center, so the longer end will protrude as much from the notch as the shorter one, because it will have gone one more half turn on the spool.
Quick Load Line Head
Over the past 10 years, these cartridges, an evolution of “beat & go”, have brought practicality not only in the thread dumping system, but also in the loading operations. With a fast charging head it is no longer necessary to open the head to recharge it with wire, the operation is also possible from the outside.
As one can see . Outwardly it resembles “beat & go” cartridges, but with a spring-loaded counter button that is no longer smooth but sculpted to allow you to grip it. This is due to the fact that inside the cartridge there is a coil, around which the wire is wound to cut the grass, the mechanism of which for releasing the wire is precisely for the impact with the ground but loading of which simply involves aligning a through hole in the spool (indicated by arrows on the button) with the wire holes.
Change yarn. With this type of wire holder, reloading the wire is very easy.
-
Align the hole marked with the arrows with the exit holes.
-
Insert one end of the wire into a hole, pull it out the other side. There are also special needles that speed up this step even more.
-
Let the same cable protrude from the two holes, then rewind it inside by turning (and pressing a little) the button in the same direction as the rotation of the head. Indeed, the stops inside the lower half-shell are offset and allow the reel to wind the cable, while the unwinding still requires a lot of pressure, as with the “beat & go”.
-
In some cartridges, such as the Stihl Autocut C25-2, the cable is not loaded by passing the same end through both holes, but rather one end of the same part is inserted a few inches into one hole and the other end in the other hole. Then you rewind it by turning the knob.
Basically this type of cartridge has the advantage of not having to dismantle the cartridge to wind the wire on the reel, and therefore for the less practical not having to argue with the wire to be able to govern it and fix it in his accommodations.
Thread head loaded and released manually
These are now old-school cartridges, which had been fitted to brushcutters as standard equipment since the mid-1990s, but can still be found installed today in some machines still in use, perhaps inherited or owned by those nostalgic for the era. ‘old times. It apparently resembles “beat & go” cartridges, but with a button carved into the bottom, in contact with the ground, which tightens the two cartridge cases making them integral with the coil inside. Inside the cartridge is a spool around which the line for cutting the grass is wound. The mechanism to release the line is actually manual, each time the line is shortened, you have to release the trimmer from the harness, manually loosen the support button, pull the line and re-tighten the button.
Charging the cable is done exactly the same way as for the “beat & go” cartridges, and you have to follow the same tricks.
Given the cumbersomeness of the operation, which requires frequent stops and some swearing for the button which will tend to tighten on its own, we suggest that you consider the possibility of replacing the cell with a newer and more efficient one, such as the “beat & go” or fast charge.
shaped cable head
There are also heads designed to hold only pieces of yarn, locked by a knot at one end or stopped by a screw system. These cartridges generally make it possible to assemble several parts at the same time, giving the impression (often of only one) of having a greater cutting capacity. However, it must be said that many of these cartridges have a very small diameter, often equal to or less than that of the bevel gear. This results in less boost, therefore less inertia and, as in the case of a small, light flywheel, an increase in engine responsiveness, but also a decrease in the ability to conserve energy , which supposes a greater tension (and wear) of the engine and especially of the clutch.