
Those of us who revel in self-sufficiency tend to make self-care a high priority. For example, many of us eat organic foods and make our own natural cleaning products. But what about personal care?
Many personal care products contain carcinogenic chemicals and petrochemical ingredients. Additionally, almost all of us have microplastics floating around in our bodies. Luckily, we can take a healthier route and make our own soaps, moisturizers, and shampoos.
Below are a few different shampoo recipes to try. You’ll need to experiment a bit to determine what works best for your hair, of course.
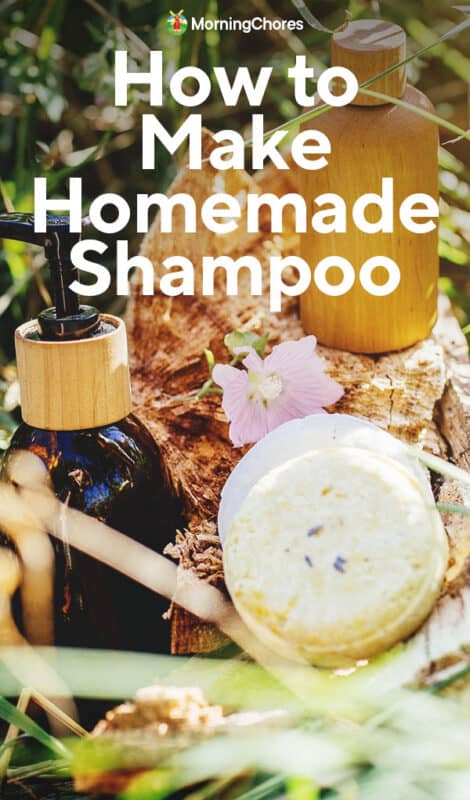
Basic shampoo recipe
This is one of the easiest shampoo recipes to try. It uses just a few simple ingredients and you can adapt the proportions as you see fit.
Ingredients:
- Liquid Castile soap (I use Dr. Bronner’s), scented or unscented
- The water
- Essential oil (optional)
- Avocado, jojoba or light olive oil (optional)
Mix equal parts castile soap and water, and stir gently so it doesn’t foam. If you have dry or curly hair, add one teaspoon of oil to two cups of shampoo.

If you chose unscented Castile soap, you can add the essential oils (EOs) of your choice. I use sandalwood and jasmine EO for my blend, while my partner prefers cedar. You can use scented castile soap if you find one you really like.
Once it’s all mixed together, use a funnel to decant it into a bottle. Then use it like you would any other shampoo. Rinse with cold or lukewarm water, then condition as usual.
Dry shampoo
If your hair is oily but you don’t have enough time to shower, a dry shampoo may do the trick. The key here is to use a base powder that won’t contrast too much with your hair color.
Ingredients:
- 1/4 cup cornstarch (for light hair) or cocoa powder (for dark hair)
- 1/4 cup kaolin clay
- 15 drops of EO of your choice (optional)

Mix the dry ingredients together in a small bowl. If adding EO, shake off the drops then stir with a fork or small whisk to distribute evenly. When you’re ready to use it, apply a little powder to your scalp with a medium-sized cosmetic brush.
Distribute it evenly and shake off the excess. This powder will absorb excess oil and keep your hair bouncy until you can wash it properly.
Shampoo bars
You can make them in any shape you want, although most people use basic round or square molds for theirs. Additionally, you can add different ingredients depending on your hair texture and fragrance preferences.

Making solid shampoo is trickier than making liquid shampoo. In fact, I wouldn’t recommend going this route until you have some experience making standard bar soaps. If you’re feeling experimental and want to try, be sure to protect yourself. Since you will be working with lye, you will need to wear gloves and eye protection.
Also, keep a cup of plain white vinegar handy. Lye is very alkaline, so if you put it on your bare skin, you can counteract its caustic effects by splashing an acid (vinegar) on it.
Finally, don’t forget to STILL add the lye into the liquid rather than the other way around. If you add liquid to the laundry, you will have the same effect as the elementary school volcano projects. The last thing you want is a caustic soda explosion in your home.
What you will need
- Scales (everything is measured by weight, not volume)
- 30 oz of blended oils, such as olive, sunflower, canola, castor, coconut, sweet almond, argan, jojoba, etc. The key here is castor oil, which lathers everything up nicely.
- Glass, plastic or ceramic bowls: lye does not react well with metals
- 4.2 oz of lye (sodium hydroxide): make sure you familiarize yourself with a good lye calculator to get the right ratios. Otherwise, your solid shampoo will not saponify
- 9.9 oz water or other liquid (like goat’s milk, coconut milk, or herbal tea)
- 3/4 teaspoon of salt: this makes shampoo and soap bars harden more quickly
- 3/4 teaspoon of sugar: optional, to increase the foam
- 30 drops of essential oil(s) of your choice: optional
- Whisk and hand blender
- Suspicious
- Spatula
- wax paper
When it comes to proportions, your oil percentages will depend on your hair type. Olive oil is ideal for those who want more moisture, while coconut and jojoba are better for thinner hair that tends to be greasy. Experiment with percentages, but make sure the weight of the oil amounts to 30 oz in total.
Likewise, the liquid you use to dissolve the lye will have different effects on your hair. Strongly brewed chamomile tea, for example, adds highlights to blonde hair. Saffron tea can give red hair a massive boost, while coffee or black tea enhances dark hair.
Step 1: Prepare the molds
Line the soap molds you use with waxed paper. This greatly facilitates the subsequent removal of shampoo bars. Alternatively, you can use flexible silicone molds that will allow you to pop the bars out easily.
Stage 2: getting fat
Combine all of your oils, including optional essential fragrance oils. If you add coconut oil to this recipe, you will need to melt it first.
I like to melt mine gently in a double boiler, but you can also heat it gently in the microwave on low heat. Combine all of your oils together in a large bowl and stir gently to combine well.
Step 3: Laundry time

Pour the liquid into a separate bowl and sprinkle the lye into it a little at a time. If you’re using milk, partially freeze it so the lye doesn’t ignite the sugars in it, then let it thaw at room temperature.
Step 4: stir
Pour the lye liquid into the oils a little at a time, stirring gently with the whisk as you go. Once mixed, also add the sugar and salt.
At this point you can use your immersion blender in short bursts, but I prefer to continue with a hand whisk. Continue to stir well until the mixture begins to “trace”. This means that when you remove the whisk, the droplets falling from it will remain on the surface of the mixture instead of sinking.
This mixture will continue to thicken as you stir. I like my mixture to be quite thick, so medium heavy when I pour it into the moulds.
Step 5: Mold
Take your ladle and pour the mixture into your soap molds. Use the spatula to extract the last wonderful bits from your bowl. Once all the shampoo is in the moulds, gently smash them onto the surface of where you are working. This will dislodge any bubbles that may be there.
Step 6: Hardening
Let the mixture sit for 48 hours before unmolding the bars. Then wrap them individually in waxed paper and let them cure for at least three months. This will give them enough time to harden for ideal use. The longer you let them cure, the firmer they will become.
Notes on hair types
As mentioned earlier, different hair types will require different ingredients. For example, my Type 2B waves usually don’t need as much moisturizer as the Type 4B coils. That said, I have dry hair, so I add light olive and avocado oils to my shampoo and conditioner. On the other hand, 4B resistors often benefit from argan or sweet almond oil.
Likewise, the scents you enjoy on the way can become annoying or overwhelming if you smell them on your own hair all day. The best thing to do is to try different ingredients in different proportions.
Write down each recipe you try until you find the one that works best for you. Once you have your eureka moment, you’ll have a proven shampoo formula you can use for years.
Don’t be afraid to experiment with different ingredients. It may take several tries before you find a formula that works best for you. Remember that none of your attempts will be a “failed” experience.
If you’re making bars and the mixture doesn’t harden to your satisfaction, you can turn it into a liquid shampoo! Simply chop the bars, mix them with water and pour them into bottles. Then use it like any standard liquid shampoo.
Happy experimenting!
Was this article helpful?
Yes No ×
We appreciate your helpful feedback!
Your response will be used to improve our content. The more feedback you give us, the better our pages will be.
Facebook pinterest